Pages

Showing posts with label Wedding. Show all posts

Monday, May 02, 2016

Couture Creations 2016/17 Design Team Audition

I would like to share with you today, my application for the   Couture Creations 2016/17 Design Team. It would be an honour, a privilege and an exciting experience to work with Australian Owned and Designed Products. 


Couture Creation Embossing Die Christmas card


Altered Shoe Link to tutorial


Scrapbook layout of Ava


Photo Box - Link to Tutorial


Wedding Ring Boxes


Wedding Photo Display Vase


All the flowers were made using Dies


Baby Rattle Card Link to tutorial

Sunday, May 01, 2016

Wedding Thank You Card - Couture Creations

Thank You card for my Wedding Series using Ultimate Crafts Magnolia Lane Designer Paper
designed by Sue Smyth

I wanted to design a Save the Date card but ran out of paper so will be off during the week to get more so I can finish off more items to complete a Wedding set fit for a Wedding. 


Cut out a white shimmer backing card 21cm x 15cm or A5 size, score in the middle in landscape side

Cut another shimmer card 10cm or 4 inch x 14cm or 5 1/2 inch and emboss with small dots embossing folder


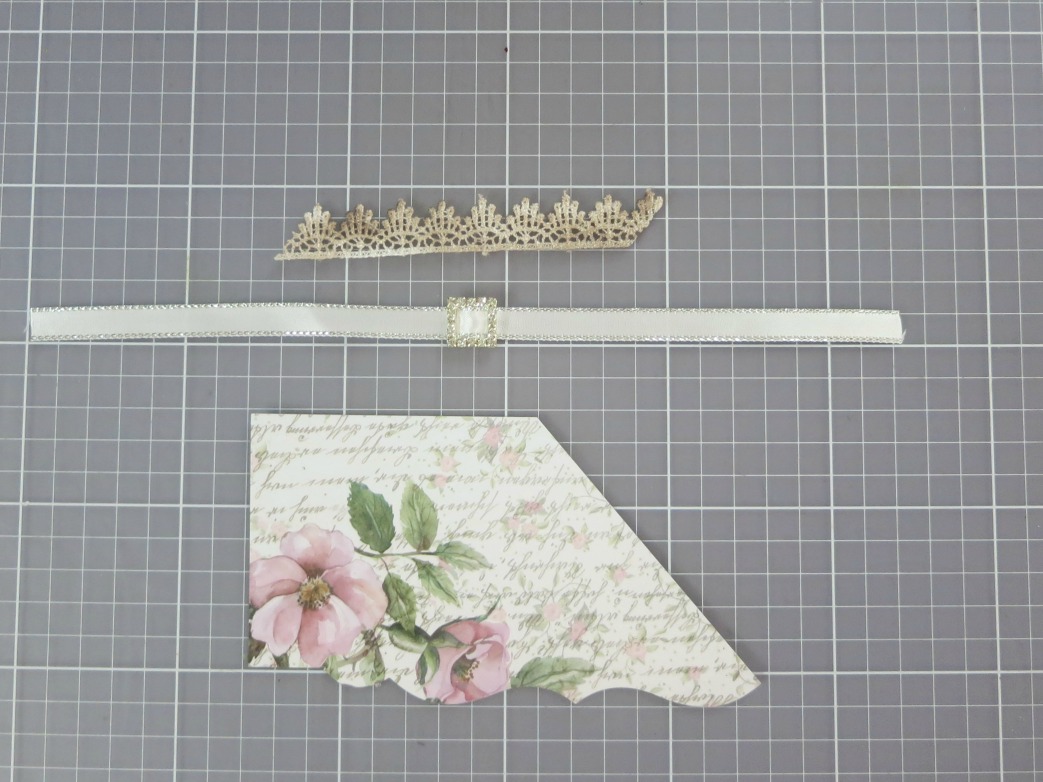
Cut Floral Fancy paper 10cm or 4 inch x 23cm or 9 inch. Make a diagonal cut from the 10cm or 4 inch edge to 1.25cm or 1/2 inch
Score as follows in inches: 1, 1 1/2,  2 1/2, 3, 4, 4 1/2, 5 1/2, 6, 6 1/2, 7 1/2, 8, 8 1/2
Concertina fold all the score lines or alternate mountain and valley folds starting with a valley fold at the 1 inch score line


Adhere the Floral Fancy paper to the embossed card


Adhere the lace to the top of the Floral Fancy  paper


Place a double sided tape over the junction of the lace and Floral Fancy paper and adhere the ribbon and buckle to the embossed card and adhere the card to the backing card


This completes my Wedding Series Collection
I hope you enjoyed the tutorials.

You will find the tutorial to the Wedding Ring or favour box HERE and the 
Wedding invitation card HERE

Couture Creations Products used
CO723631 Harmony Collection Small Dots Embossing Folder 

Ultimate Crafts Products used


Saturday, April 30, 2016

Wedding Ring or Favour Box - Couture Creations

What is a Wedding without a gorgeous Ring or Favour Box? I just love creating boxes, round, square, rectangle, you name it I love creating it. Surprisingly it doesn't take long to create one from scratch, this one only took 2 hours from beginning to end and thats only because I stuffed up the box design 3 times LOL.


Using a die cutting machine, cut 1 of Christmas Lace Collection-Christmas Star die, set aside for another project all piece except the above two pieces.


With your score tool, score at the points shown from top of die-cut to bottom


Fold mountain and valley folds so the die-cut looks like the rosette above 


Adhere double sided tape to star cutout


Attach the rosette to the star piece


Using white cardstock 210gsm cut a square 10.5cm or 4 2/16 inch square, score where the pencil lines are which are on the grid line. I find when making pieces that need a precise fold to fit together, I use the grid lines to get even folds and measurements


Cut another 15cm square or 5 10/16 inch square from white card stock, score where the pencil lines are which are slight inside the grid lines compared to the top photo which are on the grid lines.


Turn both pieces of squares over and apply double sided tape as shown in the orange part above


The lid on the left and bottom of the box should look like the above photo


From your ULT157489 Magnolia Lane, Floral Fancy designer paper 
cut the following pieces:
cut 1 of 2 1/4 inch  or 5 8/10 cm square for lid of box
cut 4 of 2 3/4 x 2 1/2 inch or 2cm x 5 8/10 cm rectangle pieces for lid of box
cut 4 of 2 3/16 x 1 3/4 inch or 5 1/2 x 4 4/10 cm squares for bottom of box


Adhere the pieces of designer paper to the box and attach legs to the bottom of the box and rosette to the top of the box. Add flowers to the middle of the rosette and lace to the edge of the lid to complete.

This is the ring box that forms part of the Wedding Set I have designed using the 


If you don't use the legs it can be a Wedding Favour Box for the guests to take home with a gift or a piece of Wedding Cake. 
I hope you enjoyed the tutorials.

You will find the tutorial to the Wedding Invitation card HERE and the 
Thank You card HERE

CO723892 Christmas Lace Collection-Christmas Star

Ultimate Crafts Products used

Friday, April 29, 2016

Wedding Invitation - Couture Creations

The invitation for my Wedding Series using Ultimate Crafts Magnolia Lane Designer Paper
designed by Sue Smyth

Those of you who know me know how much I love creating Wedding stuff. Anything to do with Weddings I love to create. There is such an elegance and happiness about it that brings out the romantic side of me. 


Take an A4 size white shimmer card and die cut one edge with a border die
Score from the uncut end 9.5cm 19.5 cm or 3 3/4 x 7 3/4 inch
Using Couture Creations embossing folder Small dots from the Harmony Collection and emboss one half of the end with the border die cut, then move the embossing folder to the other end to complete the embossing 


Cut a piece of lace 11cm long
Cut satin ribbon 27cm or 10 3/4 inch long, thread a diamante buckle onto the ribbon
Cut Magnolia Lane Designer paper Floral Fancy - 9 cm or 3 1/2 inch width and 16cm or 6 1/4 inch long and die cut one end with a border die
Trim the designer paper 9cm or 3 1/2 inch up the top to 16cm on the die cut end at an angle


Adhere your design paper to the small dot embossed side of the shimmer cardstock, adhere the lace at the cut angle and finally adhere the ribbon.

I hope you enjoyed the tutorials.

You will find the tutorial to the Wedding Ring or favour box HERE and the 
Thank You card HERE

Ultimate Crafts Products used

Couture Creations Products used
CO723631 Harmony Collection Small Dots Embossing Folder 

LinkWithin

Related Posts Plugin for WordPress, Blogger...